Tuesday, January 14, 2014
We Have A Winner Adronit Fat Quarter Give Away
I have notified Katie that she has won she has 24 hours to contact me or I will need to pick another winner. Congrates to Katie and thanks to everyone wo entered
Wednesday, January 8, 2014
The Daisy Bag
Hello. My name is June and blog over at Sew Mama June. I am so excited to be here with The Ribbon Retreat and share with you my bag; The Daisy Bag. I used the Evening Blooms line to make my bag.
Supplies:
4 sets of grommets
1/2 yard for outside of bag
1/2 yard for inside of bag
1/4 yard for top ruffle
1 fat quarter for side pockets and ruffle on handles
1 fat quarter for straps/handles ruffles
1/2 yard for straps/handles
2 yards heavy weight interfacing
1pkg 3/8" elastic

First thing you'll do is cut out all your pieces.
From the outside, inside fabric and interfacing cut 2 pieces 13"x14".
From the top ruffle fabric cut 2 pieces 5"x 21"
Side gussets from fabric and interfacing cut 2 pieces 3 1/2"x13 1/2"
Bottom gusset fabric and interfacing cut one piece 3 1/2"x14 1/2"
Side pockets cut 2 pieces at 5"x14"
Inside pocket cut one piece 12"x15"
Handles cut 4 pieces 12"x40" and 2 pieces of interfacing the same size
Ruffles cut one from each color at 1 1/2" x 53"

Now that we got the cutting done we can get started sewing.
Take your 2 strap pieces and make a sandwich with the interfaicing the middle and serge raw edges. If you don't a serger then put your right sides together with the interfacing on one side. Sew down the length on both long sides. Once you have sewn both sides turn inside out and press. Repeat this process to make your second handle.

 Do the same with the fabric that will be the ruffle on your handles/straps. Make 2.
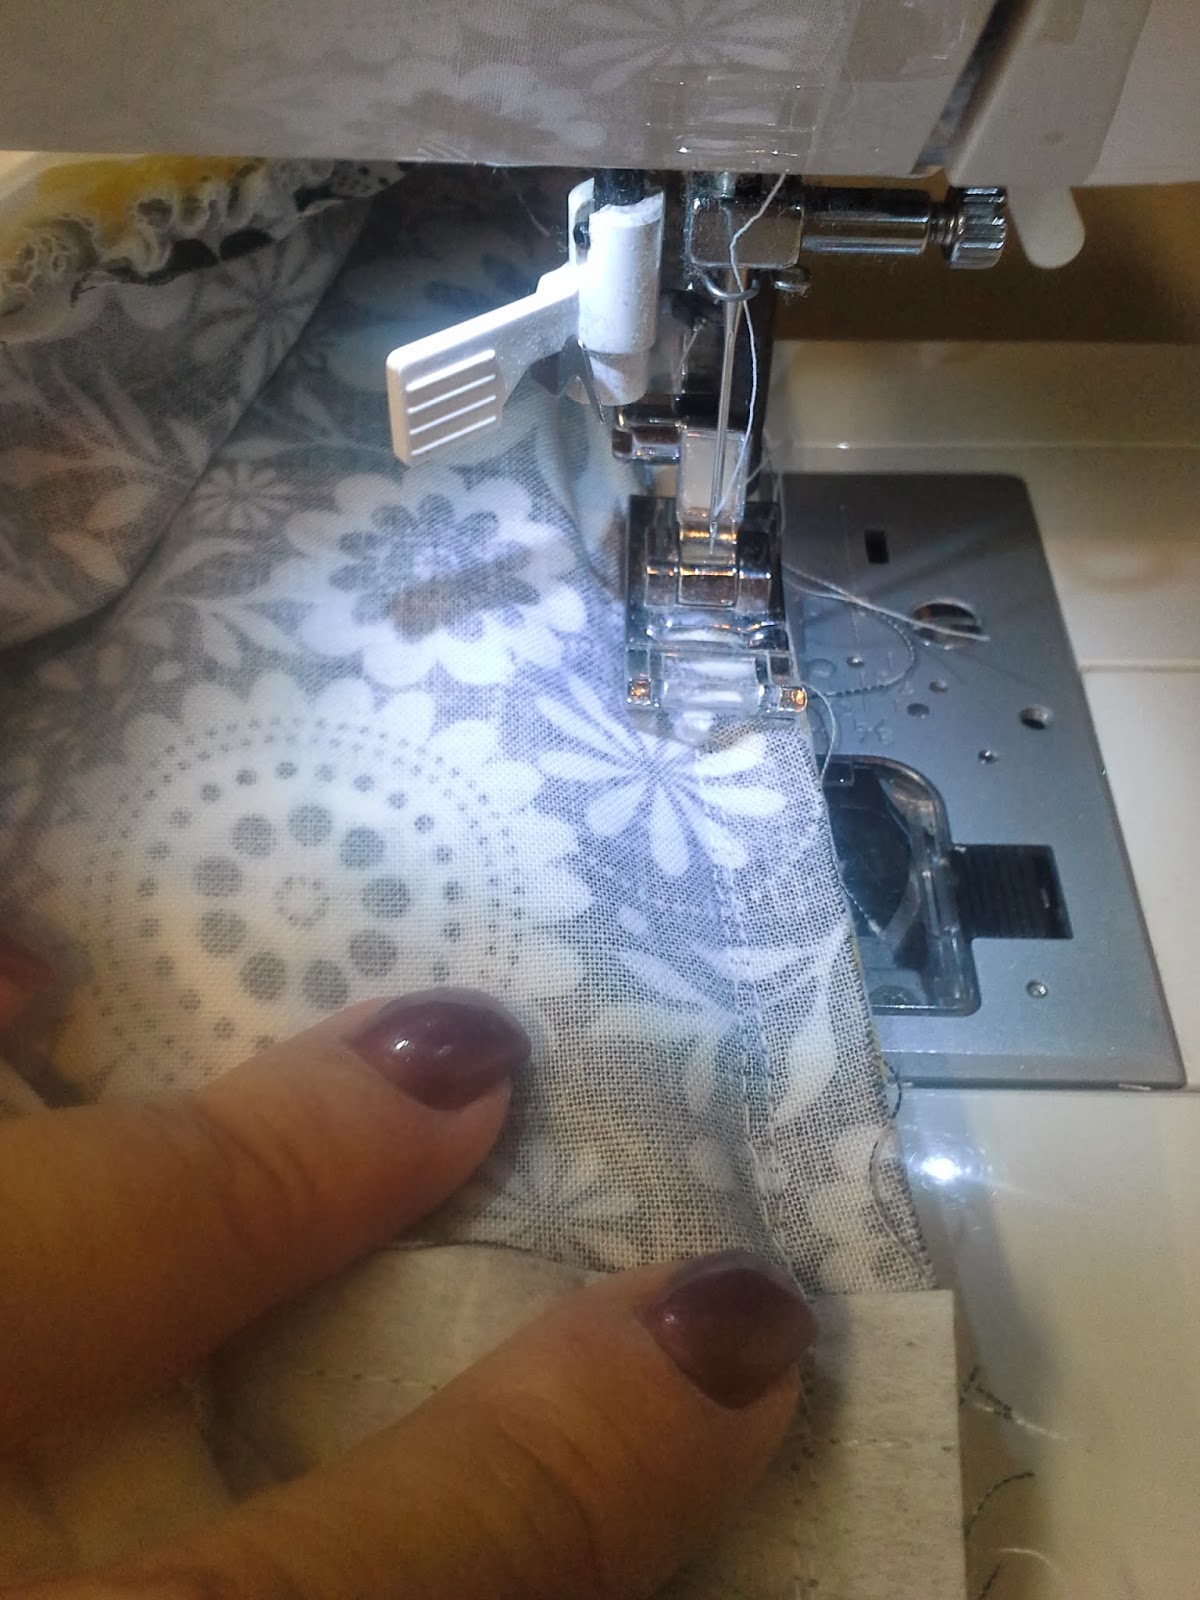
 Sew a basting stitch (the longest stitch on your machine) down the center of your ruffle. Then pull your thread to ruffle the ruffle. Pull until it is the same length as your strap. Repeat with second ruffle strip.
 Center your ruffle on the middle of you strip and sew in place on top of the basting stitch from previous stitch. Repeat with both straps.
 Set your straps aside and get the fabric to make your inside pocket.
Fold your pocket piece in half so that it measures 6"x13" and press. Cut a piece of interfacing the same size. I chose to serge my short end. But you can fold in half with right sides touching, sew down short sides. Then turn inside out and press. Line bottom raw edge up with bottom of inside fabric piece in the center. Sew in place on the 2 short sides. I sewed one 3 and two 4 inch pockets. Decide what will work for you. Draw a straight line and sew straight stay stitch to divide up the pockets.
 Sew your side gussets to the side of one lining piece and the interfacing repeat on the other side. Attach the other big inside piece to your side gussets. And now you should have a circle. The interfacing is only on your big pieces not your gussets. The interfacing will go the gussets on the outside of the bag.

 Then line up your bottom gusset piece to the bottom of the circle that is your lining and sew in place. You should now have what looks like a bag. Leave a 2" opening to turn the bag later.
 Now we will put the outside of the bag together starting with your side panels or gussets.
Make a casing at the top on a small side of your pocket fabric. You will need a 5/8" casing. Cut your elastic to 3 1/2". Feed through your casing and attach at each side so it doesn't pull through. Run a basting stitch along the bottom and gather it so that it measures 3 1/2".
 Place your pocket piece on the front of your outside gusset and line the gathered edge up with the bottom of the gusset and sew down the 2 sides. Repeat with your second side.

 Sew the outside of the bag like you did the inside. Sew your side gussets first. Make sure you have the interfacing attach to the gussets. Side and bottom.

 Now it is the top ruffle. Take your 2 pieces and attach at the short edge. Fold in half length wise and press. Sew a basting stitch along the bottom raw edge and gather until it is the same size as around your bag.
 Pin the ruffle to the top of the outside of the bag lining up raw edges and sew or serge in place.
 Turn the lining right side out and place inside the outside of the bag so the right sides are touching. Line up seams and pin place. Then sew around the top.
 Pull the outside through the inside opening.

 To attach your grommets measure in 2 1/2" in from the side and 1 1/2" from the top. Place grommet on fabric and trace the inside circle with a pencil. Then cut out on the pencil line and attach grommet. See pictures. Repeat with 4 grommets.


 Sew your inside hole closed either by hand or with your machine.

 Feed strap through grommet hole and stitch in place just above the grommet. Repeat with all grommets and straps.

 And now you have your bag! Thanks for stopping by!
Supplies:
4 sets of grommets
1/2 yard for outside of bag
1/2 yard for inside of bag
1/4 yard for top ruffle
1 fat quarter for side pockets and ruffle on handles
1 fat quarter for straps/handles ruffles
1/2 yard for straps/handles
2 yards heavy weight interfacing
1pkg 3/8" elastic

First thing you'll do is cut out all your pieces.
From the outside, inside fabric and interfacing cut 2 pieces 13"x14".
From the top ruffle fabric cut 2 pieces 5"x 21"
Side gussets from fabric and interfacing cut 2 pieces 3 1/2"x13 1/2"
Bottom gusset fabric and interfacing cut one piece 3 1/2"x14 1/2"
Side pockets cut 2 pieces at 5"x14"
Inside pocket cut one piece 12"x15"
Handles cut 4 pieces 12"x40" and 2 pieces of interfacing the same size
Ruffles cut one from each color at 1 1/2" x 53"

Now that we got the cutting done we can get started sewing.
Take your 2 strap pieces and make a sandwich with the interfaicing the middle and serge raw edges. If you don't a serger then put your right sides together with the interfacing on one side. Sew down the length on both long sides. Once you have sewn both sides turn inside out and press. Repeat this process to make your second handle.


Fold your pocket piece in half so that it measures 6"x13" and press. Cut a piece of interfacing the same size. I chose to serge my short end. But you can fold in half with right sides touching, sew down short sides. Then turn inside out and press. Line bottom raw edge up with bottom of inside fabric piece in the center. Sew in place on the 2 short sides. I sewed one 3 and two 4 inch pockets. Decide what will work for you. Draw a straight line and sew straight stay stitch to divide up the pockets.


Make a casing at the top on a small side of your pocket fabric. You will need a 5/8" casing. Cut your elastic to 3 1/2". Feed through your casing and attach at each side so it doesn't pull through. Run a basting stitch along the bottom and gather it so that it measures 3 1/2".


Sunday, January 5, 2014
Adorn It! Wildflower Quilt & Giveaway!!!
I am so excited to share this quilt with you. It was my first time working with Adorn It! And it was a lot of fun.
 I made this quilt as a wedding gift for son who is getting married next month. I used the Marbles pattern from the Simply Fat Quarter book by Its Sew Emma. I wanted to make a queen but they only had a twin or a king so I altered the pattern a little to make it smaller. I took one row of off each side.
 I think it turned out FANTASTIC! I had Melissa at Sew Shabby Quilting quilt it for me and she did such a great job. This was the first time I had her quilt for me, but I had heard such great reviews about her that I wasn't worried. And I will use her again in the future. I did a scrappy back to save fabric and I love how it turned out.
 The Adorn It collection I used was Wildflower. I love this line. Its so fun and bold. With bright colors and designs. I love the quality of fabric that Adorn It puts out. Its so soft. I love the designs that they do for their lines as well. Everytime a new collection comes out I want/need to make something with it.
 So here is the best part. Adorn It is going to give one of my readers a fat quarter bundle of this super cute line. I am so excited for you guys to be able to make something with this. Just feel out the Rafflecopter below for your chance to win. And as a reminder to enter this giveaway, or any giveaway on my blog, you MUST be a public follower of this blog using Google Friend Connect. To become a follower click on the blue link on the side that says "Join This Site". You just need an email address to follow. If you have any questions let me know.
a Rafflecopter giveaway
So here is the best part. Adorn It is going to give one of my readers a fat quarter bundle of this super cute line. I am so excited for you guys to be able to make something with this. Just feel out the Rafflecopter below for your chance to win. And as a reminder to enter this giveaway, or any giveaway on my blog, you MUST be a public follower of this blog using Google Friend Connect. To become a follower click on the blue link on the side that says "Join This Site". You just need an email address to follow. If you have any questions let me know.
a Rafflecopter giveaway
Subscribe to:
Comments (Atom)